
One of the most popular products from Amy Howard at Home is the High-Performance Furniture Lacquer. This nitrocellulose lacquer gives a bright pop of color to any rescued piece and offers a deeper finish than other lacquers. Nitrocellulose lacquer is what is most often used on pianos, guitars, and other musical instruments to give it that deep, beautiful shine. Thanks to our special formulation, you can use the High-Performance Furniture Lacquer on tons of the surfaces, like furniture, ceramic tiles, metal, glass, outdoor furniture, and more.
But how do you use this lacquer — and what do you need to know before using it?
Getting Ready to Use Amy Howard at Home Lacquer
On the latest Finish Friday, Amy talks all about using lacquer and how to get the most out of your DIY project. Because Amy Howard at Home’s lacquer comes in a bottle similar to most commercial spray paints, many first-time users assume it’s a similar application and drying process. However, because this lacquer is specially formulated to provide a high sheen and deep color, there’s a specific process you should follow.
To start a lacquer project, you’ll need to clean your surface with Clean Slate. Amy reminds us in the video that preparation is everything for a lacquer project; if you don’t remove any dirt or gunk from the surface, the lacquer won’t be able to adhere and you’ll have blemishes in your finish. You may also need to use sandpaper to remove any dings or waxy residue (320 or 400 grit sandpaper should work well). After your surface is clean and sanded, you’ll also need to apply the Furniture Lacquer Primer. This makes sure the color of lacquer will adhere to the surface, no matter what texture it is.
Once the primer is dry, it’s time to start with the fun part — using your colored lacquer! Make sure to set up a spray booth using cardboard or paint drop cloth to protect other surfaces and to protect your piece from the wind.
Applying Lacquer to Your Piece
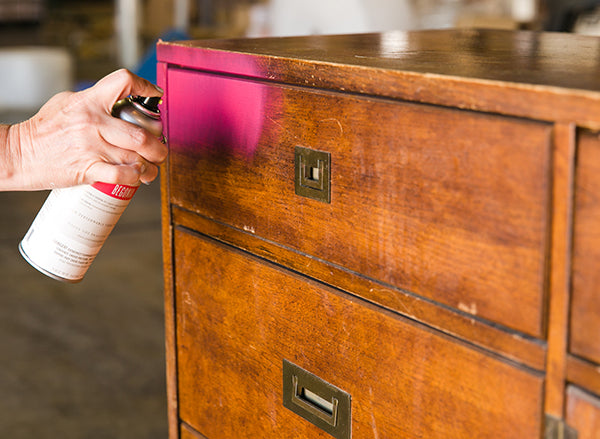
To demonstrate using the Amy Howard at Home lacquer, Amy brings her husband, Gene, onto the scene. Gene and Amy, who have been rescuing and restoring pieces for nearly 30 years, share their tips for applying lacquer to a side table, but you can take their direction and apply it to virtually any surface!
First and foremost, Gene reminds us to shake the lacquer spray bottle for about a minute to ensure the best coverage. To start spraying your piece, he demonstrates holding the nozzle 6-8 inches away from the surface and starting at the areas closest to you, working the paint away from you. For each “pass” you make over your piece, Gene recommends that you let off the nozzle to stop the flow. This ensures you don’t get a “line” or run on your surface.
Gene recommends continuing to shake your bottle and reminds you to always keep a wet edge — don’t spray one part of the piece and let it set. If you get a “run,” let it dry — you can sand it later. Once the first coat is dry, apply one more coat the same way as the first.
Last but not least, when both coats have fully dried, apply the Bright Idea Lacquer clear topcoat to protect it. The Bright Idea topcoat gives it more depth and a high level of protection. From there, your piece will be sealed, beautiful, and ready to use!
Important Advice to Remember

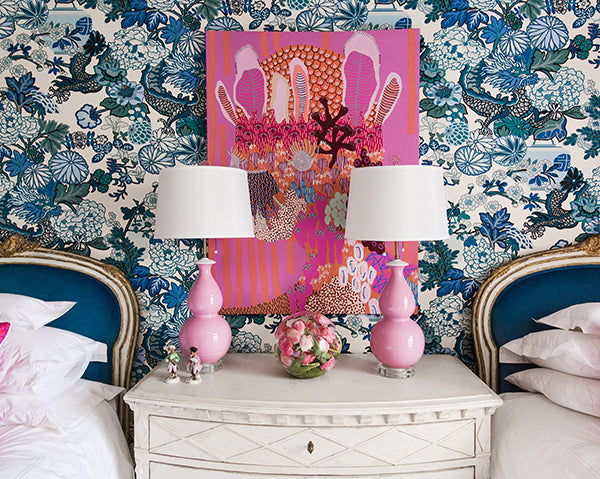
Amy and Gene love using lacquer to give a bright pop color to dull, damaged surfaces. If this will be your first time using the lacquer (or you didn’t get the results you want the first time you used it), definitely check out this week’s video. There are tons of actionable tips and hacks you can use to get the most out of your next project. Plus, Amy announces the winner of the lacquer giveaway, so make sure to watch this week’s video to see if you won!
Remember: preparation and sealing are everything when it comes to lacquer. The more time you take to clean and seal your rescued furniture or accent piece, the better the lacquer will look.
--
PRODUCTS MENTIONED
High-Performance Furniture Lacquer
Bright Idea Topcoat
Furniture Lacquer Primer
High-Performance Lacquer Bundle
Clean Slate
Next week on Finish Fridays, Amy is going to talk about cracked patinas. Don’t miss it! Follow us on Facebook and tune in every week on Fridays at noon CST to see the newest tips and tricks from Amy Howard at Home.
Leslie Shelton
Love this! Thank you
Jutz
Are you going to be adding any other colors to your Lacquer line? I’m looking for a true -blue based “Kelly Green”. For @ 6 years now I’ve been hoping this color would come into fashion. Now that it is, would you consider adding it as a choice in your fabulous paint. 🙃
Jutz
Great tutorial! So glad I saw this repost on a fellow IDAL members page. I have a huge Chinoiserie waxed piece that is begging to be freshened up! Going to give it a go!
Marilyn Lynskey
Thank you for educating USA,