Follow along as Amy Howard At Home Contributor, Tamara Hudson, creates her dream Porch Oasis!
Products used:
A Maker's Studio Stencil - Floor Tile Traditional
Step One
I started this project off a little different than usual. This porch floor was pretty dirty, so my hubby power washed it for me!

Step Two
Once the floorboards were clean and dry I used a roller to paint 2 coats of One Step Paint in Ballet White

Step Three
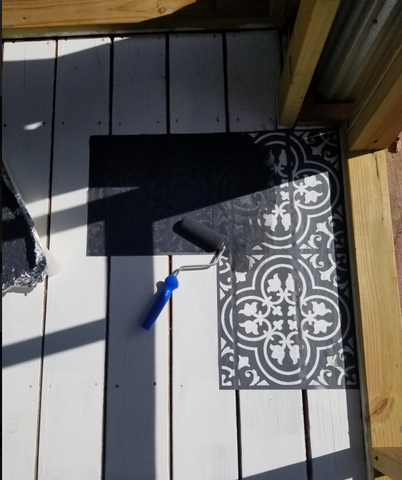
Normally when I apply a stencil to a floor, I start in the middle. BUT I started by the door this time because I wanted full squares in the areas that everyone would see. I also purchased a total of 3 stencils for the job to help it go a little faster. I positioned the stencils where I wanted to start, and I used a small foam roller to lay the Black One Step Paint down.

Step Four
Looking back I should not have done this when the sun was blaring down on the stencils/paint. As soon as I would roll the paint on the 3 stencils, I would pull them up and head inside to clean them. THIS is the BEST PART...these stencils are so easy to work with!!! All I did was run a medium temp water over them...on the painted side, not the sticky side and use my hand to gently rub the paint off. Good as new and ready to go again. IF I had waited for the sun to move, I could have probably done a few more passes, but it was literally 98 degrees and I didn't want the paint to bake onto the organza part of the stencil and clog it up.
Step Five
After rinsing the paint off the stencil, I laid them sticky side up on a towel to dry. It only took a couple minutes and I could take them back outside for some more paint. I used the stencils to make 144 tiles on my porch. Which meant 48 trips in and out...but the result is sooooo worth it!!!!! After the last 3 "tiles" were painted and the stencils were cleaned and dried...I neatly put them back on the cards they come with and into their plastic sleeves for another project later!!!!
*Note: Since I was putting this "tile" look on my old wood porch floor boards, I knew it was not going to be crisp and perfect because of the boards. I purposefully went a little lighter in areas. I wanted the floor to look like it was made from hand painted Moroccan tiles that had faded over the years.
Step Five
I laid down 1 good even coat of Matte Sealer.

Step Six
FINISH TURNING MY 10 x14 open air porch into my DREAM SCREENED IN PORCH OASIS!!! Enjoy The Bragging Rights!

